3D printing is quickly making its way into the world of manufacturing. Many 3D printing shops can create metal-printed parts for any application or use that you may have. The only contingency is that the part has to be designed for the direct metal laser sintering process.
In this piece, we’ll clear up the confusion around designing for 3D printing. We’ll explain how the metal printing process works, what you need, and a number of design considerations to help you along the way.
How Does Direct Metal Laser Sintering Work?
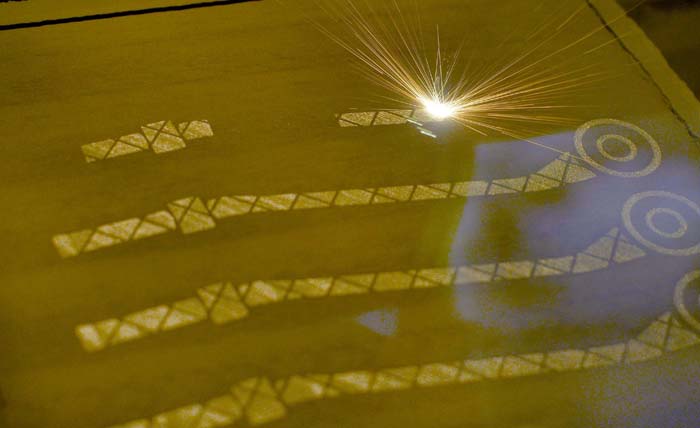
A direct metal laser sintering (DMLS) printer is one of the most common ways to 3D print metal. But, how does it work? It starts with a bed filled with powdered metal.
A laser will dance around and fuse the metal powder to one another. It starts with the bottom surface of a print and completes the whole layer. From there, another thin layer of metal powder gets placed atop the sintered layer. The laser gets back to work and makes the next layer of the print.
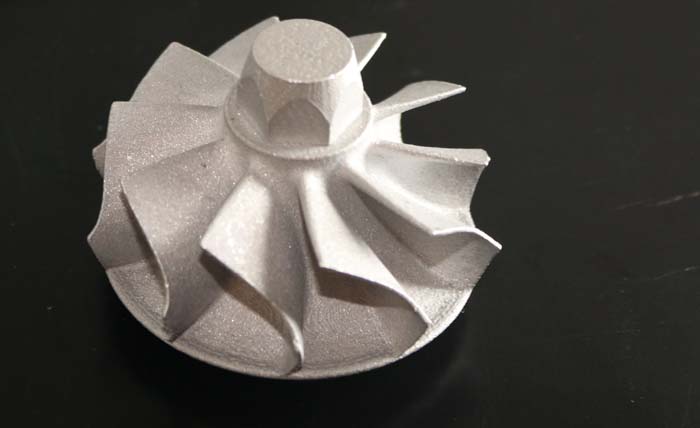
This process continues all the way up the print. In the end, you have a completed part that is sintered together. Due to this fact, the final unit works, looks, and performs identically to a machined metal piece.
What Do You Need to Get Started?
Getting a part printed from a 3D shop isn’t too difficult. For high-quality prints, you’ll need to send your 3D CAD model, a fully detailed print, and any material specifications. You can send the CAD file as a .STEP or .STL file. If you’re looking for a rough prototype, you can get away with just sending the CAD file.
The 3D CAD model gets run through a 3D printing program. The program breaks down your model into different layers and eventually converts it all to G-code, a language that machines can understand.
3D printing experts will put in all the parameters and define everything according to your specs. From there, it’s just a matter of waiting before your part is complete.
A normal part of traditional machining is a little human error through misreading a print or making small mistakes during the machining process. By using a DMLS printer, there’s no room of miscommunication, leaving you with a perfect part every time.
Certain Design Considerations for Metal 3D Printed Parts
Over the years, we’ve talked to a lot of different designers who were designing parts for us to print. If you don’t have experience designing for additive manufacturing, then we can help you with these simple tips. The following design considerations will make your part more printable in our lab.
The Part Size
The biggest consideration to make is whether or not the part can fit inside of a metal printer. Different fab shops have different size limitations that are due to the machine itself.
If the part doesn’t fit within the printing area, you’ll have to get creative and think of a way to break the part into multiple parts that later get assembled.
In our shop, we have a max part size of 275 x 275 x 400mm, or roughly 10.83 x 10.83 x 15.75 inches.
Make sure you understand the size constraint before pulling the trigger on a part. This can be done easily by giving the 3D printing shop a call and inquiring. Also, keep in mind, the bigger the part the bigger the cost. More mass converts to a longer printing time and more material used, hence more money for the print.
Built-In Threads
In some cases, parts can be printed with threads already built-in. This eliminates the need to drill and tap a piece after construction. When in doubt, you can always design a pilot hole through your part and later tap the piece.
Tolerances
3D metal printing tolerances can get pretty tight. This is great news for anyone looking to assemble a part or reverse engineer anything.
Tolerances depend on the layer thickness that the 3D printing operator inputs. There are different tolerances in the Z (up and down) direction as well as the XY (front, back, side to side) directions. In the Z direction, the tolerance is simply the layer thickness of the printer.
For the XY direction, the tolerance varies on a number of factors. In general, it’s possible to achieve XY tolerances down to around +/- 0.125mm or 0.0049”. For a comparison, tolerances around 0.05-0.10” are pretty standard in a typical machine shop.
If you want to keep a tight tolerance across the piece, we might design the piece with the intent to machine the final surfaces. This ensures that you get the perfect piece.
You can design your part with tight tolerances and a good metal 3D printer will stay true to them.
Plate Positioning of the Part
Whenever possible, you should design one of the faces to be the “plate face” of your part. This refers to the surface that will be on the bottom of the printer. Remember, metal 3D printers work from the bottom up, building layer after layer.
A well-designed base will ensure every subsequent layer is perfect. The result? A perfect final part.
The Overall Cost
One of the biggest 3D metal printing benefits is the cost savings you’ll find with 3D printing over traditional machining. For a one-off, small-batch, and low production runs, metal 3D printing is much more affordable than making your part in a traditional machine shop.
For some parts, these savings can even show up in larger production runs. A metal 3D printer is an unmanned machine that uses additive manufacturing. This means you’re not spending money on:
- Wasted material
- Man-hours
- Tooling or machining costs
- A machinist reading and interpreting a print
Engineers often have to design their parts to cost less money for a machinist to make. This means loosening the tolerances, removing internal radii, and eliminating some parts of their design. With metal 3D printing, you can leave all of these aspects in your part and still save money in the end.
Ease of Manufacturing
A lot of machinists might suggest against manufacturing certain parts. In cases where a part requires tight tolerances, unique geometry, and difficult cuts, the machining costs can be insane.
This is where the beauty of 3D printing comes in. Metal 3D printers can make these “impossible” parts easily. When you’re designing parts for direct metal laser sintering, you have a lot more creative freedom.
Post-Processing
Metal 3D printing doesn’t force you to abandon any post-processing you’re looking to do. With a metal 3D printed part, you can still:
- Heat treat
- Deburr, grind, sand, sandblast, and file
- Apply surface treatments
- Machine
- Anodized or hard coated
After all, you’re left with a part made entirely out of metal. The only difference is how the part was constructed. For all intents and purposes, imagine you have a traditionally-machined part in your hands (except you’ll have a lot more money in your pocket).
What Material Do You Want?
As a designer or engineer, you know that metals are not created equal. The beauty of metal 3D printing is that you can use the exact same 3D CAD file and get prints in different metal choices.
Most 3D printing shops offer aluminum or stainless steel. More advanced metal options are titanium, Inconel, copper, or cobalt chrome. As metal 3D printing manufacturers widen the range of metals, you’ll get even more choices in the coming years.
If you work with a shop that offers multiple metal selections, make sure you consider which option works best for your application.
Methods for Making Your 3D Prints Lightweight
The other beauty of metal 3D printing is the ability to lightweight a piece easily. Of course, this is a term that refers to making a final piece weigh less.
With DMLS, you can make the interior hollow or use a honeycomb pattern. This immediately lessens the overall weight and speeds up the manufacturing process. Since it’s quicker and uses less material, it usually means your part costs less as well.
If the part is designed to support itself, interior supports won’t be required. Again, this is a way to lighten the part while speeding up production and using less material.
Finally, you can always “Swiss cheese” the model. By designing holes, bridges, and channels in the model, you’re left with a lighter part.
Learn More from the 3D Printing Experts
You just learned all about designing parts for direct metal laser sintering printers. We reviewed how DMLS printers work, what you need to get a print, and some considerations to make during the designing process.
If you have any more questions, you can reach out to our pros at 3D Printed Parts. We offer affordable and quick DMLS printing for any application or need. Get a free, custom quote today and get the best metal 3D printed part. For more 3D printing information, check out the rest of our blog.
Recent Comments